Best Practices for Organizing Your Sketch Files
If you’re working by yourself, organizing your design file will help to optimize your own workflow. By investing a little bit of time every once in a while, you’ll create a logical and ordered file that will make it easier for you to both find what you’re looking for, and update it in a quick and efficient way. You’ll also thank yourself if you have to come back to a design file after a couple of months. This organization will make it much easier for you to get back into the project.

But if you’re working with teams, organization is mandatory. Having an agreed upon way to organize your files makes it much easier for designers to share files and work on the same projects. Having unorganized files slows down each designer who then has to relearn how each file is put together. Each design team may have specific standards for naming and organization. In that case, you’ll want to follow those standards wherever possible.
When Should I Organize?
I personally like cleaning up my file once most of the major components are starting to take shape. I’ll start to clean up my files once I’m happy with a particular design iteration. Some people like to organize continuously as they go along. Find a workflow that works well for you. However, you should absolutely clean up your files before sharing your Sketch files with anybody else.
One Document Per Project
A project can be defined as an either an entire application or just the entire portion that you’re responsible for. Our main goal with keeping it all together is to reduce the number of design files and keep our assets like symbols and shared styles in one place. You might not always be able to use one Sketch file for everything, but try to consolidate wherever possible.
Use Pages
It’s tempting to try to keep every artboard for your design files in one page. However, as your application grows and the number of unique states increases, it can quickly get overwhelming and hard to find a particular artboard. You’ll also find that the performance of Sketch will start to slow down as it tries to render pages with massive amounts of artboards.
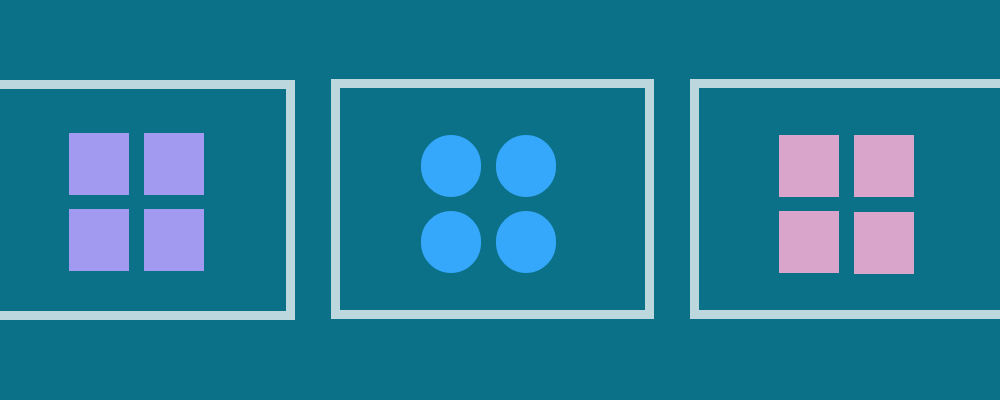
You’ll want to break up your artboards into logical pages. There isn’t one correct way to do this because it will depend on the size and complexity of your project. Some suggestions include:
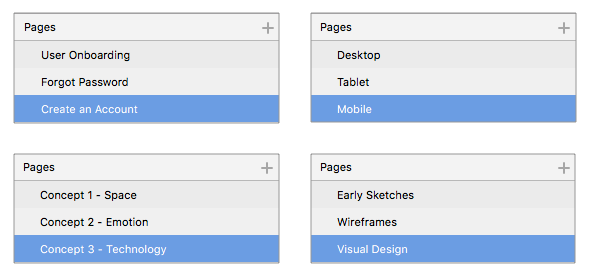
Pick whichever format makes the most sense for your project, or if you’re working with others, with your team. If you’re working with a team, see if there’s already a standard in place that you can follow. If there isn’t one established yet, see if you can collaborate to figure out a method that makes sense for everybody.
Visually Organize Your Artboards on Your Pages
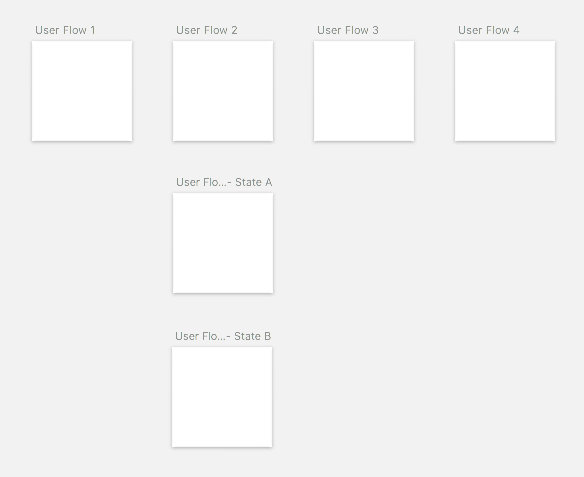
Spatially, I like to visually order my main screens from left to right into a single line. So if I’m designing a user flow like a checkout process, the left most screen would be the first main step in the process, like a shopping cart. Each screen to the right would be the next step in the process.
Underneath those main screens are any alternative states or supporting assets. If I wanted to show an error state, I would put that error state’s artboard underneath the main flow.
Name Your Artboards
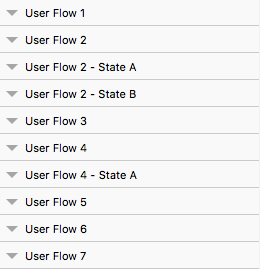
“Profile Copy 22” isn’t the most descriptive name for an artboard. Give each unique artboard a descriptive name. If you’re naming a state, a useful naming convention is to use (Name of Main User Flow — Name of State).
The fastest way to rename artboards is to select one in your layer list and use the shortcut command+R
After you do this, use your keyboard to cycle through your layers. tabgoes down the layer list, shift+tab goes up the layer list.
Order Your Artboards
Now that your artboards are logically named, make sure that they’re also in a logical order. This will be very helpful if we need to add an extra artboard or step in the middle of our file. Then we can find our artboards, select multiple artboards in the layer list, and bulk move them at once.
What I recommend is putting the left-most artboard at the top. If there is a state associated with that artboard, put each state underneath that artboard. Then continue to the next artboard in your flow.
The fastest way to do this is to pair the shortcuts we just learned: tab goes down the layer list, shift+tab goes up the layer list.
Name Your Layers
The same rules apply to layers as artboards. Rectangle Copy 12 isn’t a descriptive enough name. Name each layer to something that will make sense to you when you open up this file a couple months from now.
In the layer list, return moves your selection one level deeper (Artboard > Layer)
esc moves your selection up one level higher (Artboard < Layer).
Practice using these shortcuts to navigate and rename your layers.
Group Your Layers
As an organizational tool, it’s useful to group related layers together. command+G groups items, and shift+command+G ungroups them.
Once grouped together, by default, clicking on this group will select everything. Initially this can seem annoying because in order to change a grouped layer, you’ll have to double-click multiple-times into a group to select the layer. A useful shortcut when dealing with groups is holding command while you click. This will ignore any groupings and select any layer regardless of grouping. What this feature then provides is the choice of selecting the entire group which is useful for when you want to move something like a search box, versus changing a text layer in the search box directly.
If it’s helpful, you can nest groups. Try not to overdo it though, there can be a point where this becomes more confusing. While you’re creating groups, it’s helpful to rename them right away, since we’re already in cleanup mode.
Why is my Group so Big?
The bounding box for your group will include the size and position of all your elements. Sometimes text layers can get a little bit out of control. Try resizing the bounding box of your text elements to better fit your text. Other potential “group busters” can include large images paired with image masks.
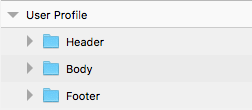
Order Your Layers and Groups
Just like our artboards, it helps to have a logical order for our layers. In general, I recommend ordering your layers to match the appearance of your document.
There may be use cases where this order will break your design. Elements that always need to be on top (like a hovering footer) will have to be at the top of your layer list. This is OK! Remember, this is just a method to help organize your files, it should never inhibit your workflow.